Unleash Your Style: 60+ Stunning Toe Nail Designs For Every Mood
In the world of beauty and self-expression, our feet often get overlooked, tucked away in shoes for most of the year. However, with the arrival of warmer weather and the glorious return of sandal season, it's the perfect time to let our toes shine! Embracing vibrant and creative **toe nail designs** is not just about aesthetics; it's a delightful way to express your personality, elevate your mood, and add a touch of polished charm to your overall look. From subtle elegance to bold statements, the possibilities for transforming your toenails into miniature works of art are truly endless.
Whether you're planning a beach vacation, attending a special event, or simply want to add a splash of joy to your everyday life, a well-executed pedicure with a captivating design can make all the difference. This comprehensive guide will explore a myriad of **toe nail designs**, offering inspiration, practical tips for DIY enthusiasts, and essential advice for maintaining healthy, beautiful nails. Get ready to discover how to turn your toes into a canvas for creativity, making every step a stylish statement.
Table of Contents
- Why Toe Nail Designs Are More Than Just Pretty Nails
- Essential Tools and Prep for Perfect Toe Nail Designs
- Exploring Popular Toe Nail Design Categories
- DIY Toe Nail Designs: A Step-by-Step Guide
- Maintaining Your Stunning Toe Nail Designs
- Addressing Common Concerns & Nail Health
- Finding Your Signature Toe Nail Design
Why Toe Nail Designs Are More Than Just Pretty Nails
Beyond the obvious aesthetic appeal, embracing **toe nail designs** offers a surprising array of benefits that contribute to overall well-being and confidence. It's a form of self-care, a small indulgence that can significantly boost your mood. Think about it: a quick glance down at beautifully adorned toes can bring a smile to your face, especially when you've chosen a design that truly resonates with your personality.
For many, a pedicure is a ritual of relaxation, a moment to unwind and de-stress. Adding a creative design transforms this ritual into an act of self-expression. Whether you opt for a subtle glitter, a bold floral pattern, or even tiny cartoon characters, your toe nails become a canvas reflecting your current mood, interests, or even aspirations. They can complete an outfit, making your footwear choices pop, or simply serve as a hidden gem that only you know about, a secret source of joy. Furthermore, well-maintained and decorated toe nails often encourage better foot hygiene, as you're more likely to care for something you've invested time and creativity into. It’s a simple yet effective way to feel put-together, confident, and ready to take on the world, one stylish step at a time.
Essential Tools and Prep for Perfect Toe Nail Designs
Achieving stunning **toe nail designs**, whether at home or in a salon, begins with the right tools and meticulous preparation. Just like an artist prepares their canvas, you need to ensure your nails are clean, healthy, and ready to receive polish and intricate details. Skipping these crucial steps can lead to chipped polish, uneven application, and even potential nail health issues.
Gathering Your Supplies
Before you even think about applying color, ensure you have all your essentials within reach. This prevents interruptions and ensures a smooth process. Here’s a checklist of what you’ll need for your next pedicure and design session:
- Chris Brown Kids
- Gotta Be Quicker Than That
- Colleague Zone
- Natasha Klauss
- How To Make A Bow Out Of Ribbon
- Nail Polish Remover: Acetone-free is gentler on nails.
- Cotton Pads or Balls: For removing old polish and cleaning.
- Nail Clippers: For trimming nails to your desired length.
- Nail File: To shape and smooth the edges of your nails.
- Nail Buffer: To gently smooth the nail surface, creating an even base.
- Cuticle Pusher (Orange Stick or Metal): To gently push back cuticles.
- Cuticle Oil: To moisturize cuticles.
- Foot Soak (Optional but Recommended): Warm water with Epsom salts or a specialized foot soak.
- Foot Lotion: To moisturize your feet after soaking.
- Toe Separators: Essential for keeping toes apart during polishing.
- Base Coat: Protects nails from staining and helps polish adhere better.
- Nail Polish Colors: Your chosen shades for the design.
- Top Coat: Adds shine, protects the design, and extends wear.
- Detailing Brushes/Dotting Tools: For intricate designs like polka dots, lines, or characters.
- Tweezers: For picking up small embellishments like glitter or rhinestones.
- Rubbing Alcohol or Nail Cleanser: To remove natural oils from the nail plate before base coat.
The Importance of Proper Nail Preparation
This is where the foundation for long-lasting and beautiful **toe nail designs** is laid. Do not rush this stage!
- Remove Old Polish: Start by thoroughly removing any old nail polish. Ensure no residue remains.
- Soak Your Feet: A warm foot soak for 5-10 minutes softens skin and cuticles, making them easier to work with.
- Trim and File: Trim your toenails straight across to prevent ingrown nails. Then, gently file them into your desired shape (usually square or squoval for toes) and smooth any rough edges.
- Push Back Cuticles: Gently push back your cuticles with a cuticle pusher. Avoid cutting them, as this can lead to infection. Moisturize with cuticle oil.
- Cleanse the Nail Plate: This is a crucial step for polish adhesion. Use rubbing alcohol or a nail cleanser on a cotton pad to wipe down each nail. This removes any natural oils or lotion residue that could prevent the polish from sticking properly.
- Place Toe Separators: As mentioned in the "Data Kalimat," this is "Step 1 of this toe nail designs tutorial." Place the toe separators on your feet. They are indispensable for preventing smudges and ensuring each nail dries independently.
- Apply Base Coat: Apply a thin, even layer of base coat to each nail. This acts as a protective barrier, preventing your nails from staining, and provides a sticky surface for your color polish to adhere to, extending the life of your **toe nail designs**. Let it dry completely.
Exploring Popular Toe Nail Design Categories
The world of **toe nail designs** is vast and exciting, offering something for every taste, occasion, and skill level. Whether you're a minimalist or a maximalist, there's a design waiting to express your unique style. Let's dive into some of the most popular categories that will inspire your next pedicure.
Abstract & Geometric Wonders
Abstract and geometric **toe nail designs** are perfect for those who appreciate modern art and clean lines. These designs often involve interesting shapes, lines, and color blocking, creating a sophisticated and contemporary look. Think of:
- Color Blocking: Using two or more contrasting colors to create distinct sections on the nail. This can be simple horizontal or vertical lines, or more intricate diagonal divisions.
- Minimalist Lines: A single thin line (horizontal, vertical, or diagonal) across a nude or solid colored base. Elegant and chic.
- Geometric Shapes: Triangles, squares, or circles artfully placed on the nail. These can be filled in or left as outlines.
- Swirls & Marbles: Using a dotting tool or a fine brush to create fluid, organic shapes that mimic marble or abstract swirls.
These designs are incredibly versatile and can be adapted to any color palette, from muted pastels to vibrant neons. They often look best on slightly longer toenails, especially the big toe, which offers a larger canvas.
Whimsical & Cartoon Characters
For the playful at heart, whimsical and cartoon character **toe nail designs** are an absolute delight. These designs are fun, expressive, and guaranteed to bring a smile to your face and those around you. As mentioned in the "Data Kalimat," you can find inspiration "from abstract colors to cartoon characters."
- Cherries: A classic, cute, and relatively easy design. Two red dots with a green stem.
- Mermaids: Using iridescent or glitter polish as a base, then adding scale patterns with a darker shade or a stamping plate.
- Polka Dots: Simple, timeless, and endlessly customizable. Use a dotting tool for perfect circles of varying sizes. From "glitter, florals, polka dots, to mermaids, cherries and more," polka dots are a perennial favorite.
- Tiny Animals: Simple outlines of ladybugs, bees, or even cartoon versions of your favorite pets.
- Food & Drink: Miniature watermelons, pineapples, or even tiny coffee cups.
These designs are particularly popular during "sandal season" and can be a fantastic way to "show your personality" and celebrate summer. They often work best on the big toe, with smaller, complementary designs (like polka dots or solid colors) on the other toes.
Elegant & Classic Styles
Sometimes, less is more. Elegant and classic **toe nail designs** offer a sophisticated look that never goes out of style. These are perfect for those who prefer understated beauty or need a design that transitions seamlessly from casual to formal settings.
- French Pedicure: The epitome of classic elegance. A nude or sheer pink base with crisp white tips. This design instantly makes your toes look clean and polished.
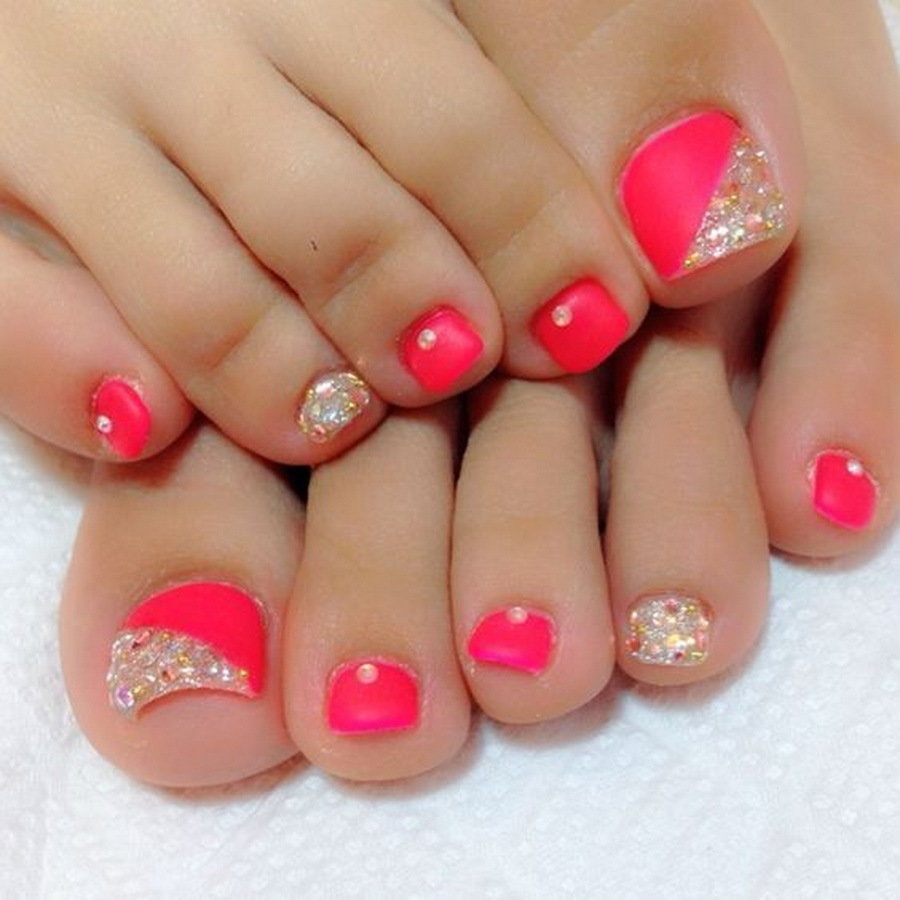
- Solid Colors with a Twist: A single, rich color (think deep reds, navy blues, or classic nudes) adorned with a subtle accent. This could be:
- Glitter Accent: A single nail (often the big toe) covered in fine glitter, or a glitter top coat over a solid color. "From glitter, florals..."
- Rhinestone Embellishment: A tiny, strategically placed rhinestone at the base or corner of the nail.
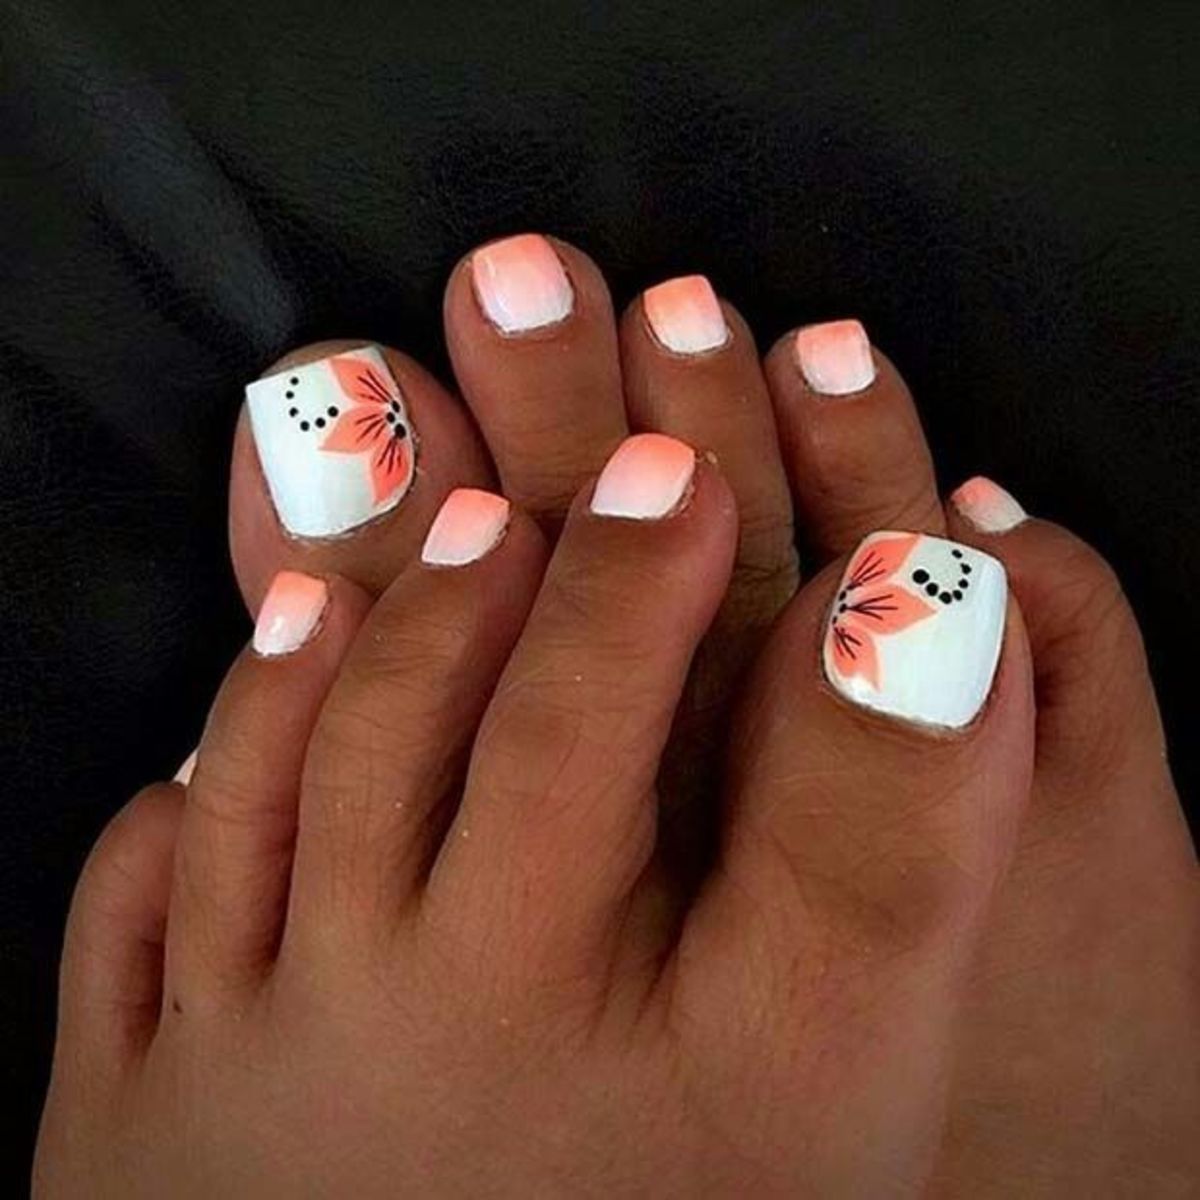
- Ombre Effect: A subtle gradient from one color to another, or from a solid color to a sheer tip.
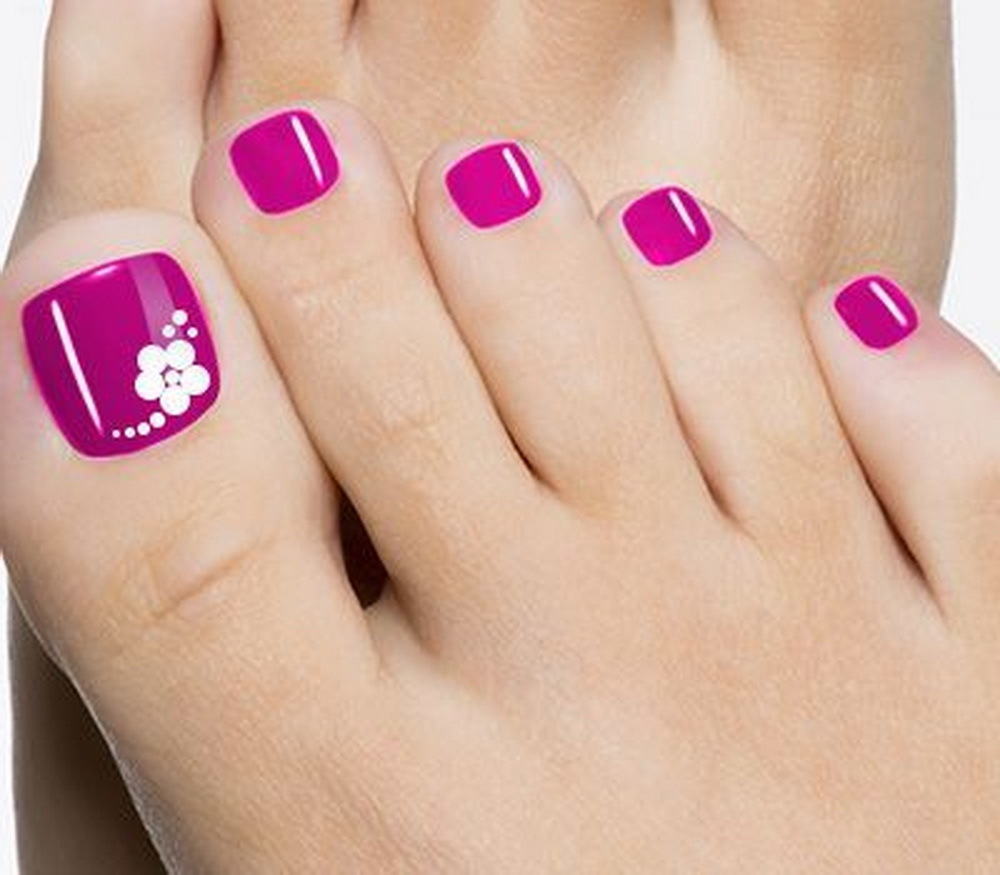
- Subtle Florals: Delicate, small floral patterns that don't overwhelm the nail. Think tiny roses or simple daisy outlines. "From glitter, florals..."
These designs are perfect when you "want to try something elegant" and are guaranteed to make your feet look refined and well-groomed.
Seasonal & Themed Designs
**Toe nail designs** are an excellent way to celebrate seasons, holidays, or special events. They allow you to immerse yourself in the spirit of the moment and add a festive touch to your look.
- Summer Vibes: Bright colors like turquoise, coral, and sunny yellow. Designs featuring palm trees, ocean waves, anchors, or even tiny suns. These are "perfect for sandal season."
- Autumn Hues: Warm tones like burnt orange, deep red, forest green, and mustard yellow. Designs could include falling leaves or simple plaid patterns.
- Winter Wonderland: Cool blues, silvers, and whites. Snowflakes, glitter, or even tiny festive lights.
- Holiday Specific:
- Valentine's Day: Hearts, shades of red and pink.
- Halloween: Spiders, webs, pumpkins, or spooky eyes.
- Christmas: Candy canes, holly, Santa hats, or festive stripes.
- Event Specific: Colors and themes matching a wedding, graduation, or a sports event.
"Whether you want to celebrate summer, show your personality, or try something elegant, there is a design for you." This flexibility makes themed **toe nail designs** incredibly popular and fun to experiment with.
DIY Toe Nail Designs: A Step-by-Step Guide
Creating your own stunning **toe nail designs** at home is a rewarding experience. With a little patience and the right technique, you can achieve salon-quality results. Here’s a detailed guide, incorporating the "Data Kalimat" provided:
- Preparation is Key (Revisit): Ensure your nails are prepped as described in the "Essential Tools and Prep" section. This means clean, filed, buffed, cuticles pushed back, and a base coat applied and fully dry. Don't forget to "Place the toe separators on" – this is crucial for preventing smudges.
- First Layer of Color: "Apply pink gloss simply on the nail plates" (or your chosen base color). Apply a thin, even coat of your primary polish color. Thin layers are essential for quick drying and preventing bubbling. Allow this layer to dry completely. This might take 5-10 minutes per coat, depending on the polish.
- Second Layer (If Needed): "If the color is also weak, use the 2nd layer." Most polishes require a second coat to achieve full opacity and true color. Apply this second thin layer and allow it to dry completely. Patience here is paramount! Rushing will lead to smudges and dents.
- Time for the Design: Once your base color is absolutely dry to the touch, it's time for the fun part – adding your design!
- For Polka Dots: Dip a dotting tool (or the blunt end of a toothpick/bobby pin) into a contrasting polish color. Gently press it onto the nail to create dots. Start with larger dots on the big toe, and smaller ones on the others.
- For Stripes/Lines: Use a fine striping brush. Dip it lightly into polish, remove excess, and draw your lines carefully. For perfectly straight lines, you can use striping tape as a guide.
- For Abstract Swirls: Apply a few drops of different colors onto the nail, then use a thin brush or dotting tool to gently swirl them together before they dry.
- For Cartoon Characters/Intricate Details: This requires a steady hand and very fine brushes. Work slowly, building up the design layer by layer. Practice on a piece of paper first if you're new to this.
- For Glitter: You can apply a glitter polish as a top coat, or if using loose glitter, apply a clear polish layer, sprinkle glitter onto it, then gently pat it down before it dries.
- Let the Design Dry: Allow your design elements to dry thoroughly. This is critical before applying the top coat, otherwise, your design might smudge.
- Apply Top Coat: Once your design is completely dry, apply a generous layer of top coat. This seals in your design, adds shine, and protects your **toe nail designs** from chipping and fading. For extra durability, consider a gel-effect top coat.
- Clean Up: Dip a small brush (like an eyeliner brush) or a cotton swab into nail polish remover and carefully clean up any polish that got onto your skin around the nails.
- Moisturize: Finish by applying cuticle oil and a rich foot cream to keep your feet and nails hydrated.
Maintaining Your Stunning Toe Nail Designs
You’ve put in the effort to create beautiful **toe nail designs**, now it’s time to ensure they last! Proper maintenance is key to extending the life of your pedicure and keeping your nails looking fresh and vibrant.
- Reapply Top Coat: Every 2-3 days, apply a fresh thin layer of top coat. This acts as a protective shield, refreshing the shine and reinforcing the design against chips and wear.
- Moisturize Regularly: Keep your cuticles and nails hydrated with cuticle oil daily. This prevents dryness, which can lead to chipping and peeling polish.
- Wear Appropriate Footwear: While showcasing your **toe nail designs** in sandals is the goal, avoid tight shoes that rub against your nails, as this can cause chips. When exercising or doing chores, consider wearing closed-toe shoes to protect your pedicure.
- Avoid Harsh Chemicals: When cleaning or doing dishes, wear gloves to protect your hands and feet from harsh detergents that can strip polish and dry out nails.
- Be Gentle: Avoid using your nails as tools to pick or scrape things, as this will inevitably lead to chips and damage to your design.
- Allow Drying Time: Even after your polish feels dry to the touch, it can take hours for it to fully cure. Be mindful for the first few hours after your pedicure to avoid major smudges or dents.
Addressing Common Concerns & Nail Health
While focusing on beautiful **toe nail designs**, it's crucial not to overlook the health of your nails. Healthy nails are the foundation for any great design. Prioritizing nail health also aligns with the E-E-A-T principle, ensuring trustworthy and expert advice.
- Hygiene is Paramount: Always start with clean feet and nails. Ensure all tools, whether at home or in a salon, are properly sterilized to prevent fungal or bacterial infections. If doing a DIY pedicure, clean your tools with rubbing alcohol before and after use.
- Recognizing Issues: Be aware of changes in your nail color, texture, or shape. Discoloration (yellow, green, or black), thickening, or crumbling nails could indicate a fungal infection. Redness, swelling, or pain around the nail bed might signal an infection or ingrown nail.
- Professional Pedicures: If you opt for salon pedicures, choose reputable establishments that prioritize hygiene. Look for salons that use sterilized tools (often in sealed pouches), have clean foot baths (pipeless systems are often preferred as they are easier to clean), and ensure technicians do not cut cuticles excessively.
- Avoid Over-Buffing: While buffing creates a smooth surface for polish, over-buffing can thin the nail plate, making it weaker and more prone to damage.
- Give Your Nails a Break: Occasionally, allow your nails to go polish-free for a few days. This gives them a chance to "breathe" and rehydrate naturally.
- Proper Polish Removal: Always use an acetone-free nail polish remover to minimize drying and damage. Never peel or chip off polish, as this can remove layers of your natural nail along with the polish.
- Seek Professional Advice: If you notice persistent discoloration, pain, swelling, or suspect a fungal infection, consult a dermatologist or podiatrist. Early intervention can prevent more serious issues.
Finding Your Signature Toe Nail Design
With so many options, how do you choose the perfect **toe nail designs** for you? The key is to experiment and find what makes you feel confident and happy.
- Consider Your Style: Are you generally minimalist, bold, playful, or elegant? Let your personal fashion sense guide your nail choices.
- Match the Occasion: A subtle French tip might be perfect for a formal event, while vibrant abstract colors or cartoon characters are ideal for a summer vacation. "Whether you want to celebrate summer, show your personality, or try something elegant, there is a design for you."
- Look for Inspiration: Social media platforms like Pinterest and Instagram are treasure troves of ideas. Search for "toe nail designs," "toe nail art," or "toe nails" (as suggested in the "Data Kalimat") to see what's trending and what catches your eye. Save images you love to create a personal mood board.
- Start Simple: If you're new to nail art, begin with simpler designs like polka dots, single stripes, or a glitter accent. As your confidence grows, you can move on to more intricate patterns.
- Don't Be Afraid to Experiment: The beauty of nail polish is that it's temporary! If a design doesn't turn out as expected, you can always remove it and try something new.
Remember, your **toe nail designs** are an extension of your personality. Have fun with it, express yourself, and enjoy the process of creating miniature masterpieces on your toes.
Conclusion
From the vibrant hues of summer to the subtle elegance of classic styles, **toe nail designs** offer an incredible avenue for self-expression and a delightful boost to your confidence. We've explored a vast array of possibilities, from abstract colors and geometric patterns to whimsical cartoon characters and timeless French tips. We've also delved into the essential tools, meticulous preparation, and step-by-step guidance for creating your own designs at home, emphasizing the importance of thin layers and proper drying.
Beyond the aesthetics, we've highlighted the critical role of nail health, hygiene, and maintenance in ensuring your stunning designs last and your feet remain healthy. Ultimately, your toenails are a canvas waiting for your unique touch. So, whether you're celebrating sandal season, showcasing your playful side, or simply indulging in a moment of self-care, there's a perfect design waiting for you. We hope this guide has provided ample inspiration and practical advice for your next pedicure adventure. What are your favorite **toe nail designs**? Share your thoughts and ideas in the comments below, or explore more of our beauty articles for further inspiration!
- Bares Hideaway
- Turkish Quandale Dingle
- Wendys Mars Collaboration
- Jules Hoffman
- Key And Peele Football Names
88 Stylish Toe Nail Art Designs That You'll Want to Copy
White Toe Nail Designs
88 Stylish Toe Nail Art Designs That You'll Want to Copy
