Fixing Zipper Woes: Your Ultimate Guide To DIY Zipper Repair
Table of Contents
- The Frustration of a Faulty Zipper: Why DIY Repair Matters
- Understanding Common Zipper Problems
- Essential Tools for Your Zipper Repair Toolkit
- Step-by-Step Guide: How to Fix a Split Zipper
- Unsticking a Stubborn Zipper: Simple Lubrication and Release Techniques
- Rescuing a Broken or Detached Zipper Slider
- Addressing Missing Teeth and Preventing Zipper Sliders from Coming Off
- When All Else Fails: Replacing the Entire Zipper (and Alternatives)
The Frustration of a Faulty Zipper: Why DIY Repair Matters
Zippers are an ingenious invention, providing a quick and secure closure for countless items. However, over time, zippers tend to wear out. Constant use, exposure to elements, and even manufacturing defects can lead to a variety of issues. Zippers can eventually separate while closing, causing the slider to unhook from one side of the chain, or they might simply get stuck, rendering the item unusable. The good news is that many of these problems don't require a professional tailor or the outright replacement of the item. Since 1993, countless individuals have successfully learned how to fix a zipper themselves, saving their cherished belongings from an early retirement. This DIY approach not only saves money but also offers a sense of accomplishment. Imagine being able to save a jacket, a tent, a sleeping bag, and many other items just by applying a few simple techniques. This guide aims to empower you with that knowledge, making zipper repair an accessible skill for anyone.Understanding Common Zipper Problems
Before diving into the fixes, it's helpful to understand the different ways a zipper can fail. Recognizing the specific problem is the first step in finding the right solution. Here's how to repair broken, stuck, and separated zippers on clothes and items, by first identifying the core issue.Zipper Teeth Separating Behind the Slider (Split Zipper)
A split zipper occurs when the zipper appears to close as you zip it up, but the teeth separate behind the slider. In other words, the zipper pull moves up or down, but the two sides of the zipper simply won't stay together. This is one of the most annoying problems with a zipper, as the teeth won't close, rendering the closure useless. This often happens when the slider itself has become too loose or worn, failing to properly engage and press the teeth together.Stuck Zippers: When Fabric or Debris Gets in the Way
A stuck zipper is perhaps the most common and immediately frustrating issue. This happens when fabric, threads, or even dirt and grime get caught in the zipper teeth or within the slider mechanism. The zipper pull won't budge, or it moves only with great difficulty. This is especially handy to fix a zipper stuck in the fabric itself, often due to a stray thread or a fold of material.Broken or Detached Zipper Sliders
Sometimes, the zipper slider has completely separated from the rest of your zipper, or it might be broken in a way that prevents it from functioning. What are you supposed to do now? Not to worry—all you need is a pair of pliers and some top stops or square tabs to get your zipper moving again. A broken slider can also manifest as a pull tab that has snapped off, making it impossible to grip and move the slider.Missing or Damaged Zipper Teeth
While less common for a quick fix, a zipper with missing or damaged teeth can be a significant challenge. If a few teeth are bent or missing, the zipper won't be able to properly interlock, leading to separation or complete failure. This issue often requires more advanced repair or even replacement, though some clever tricks can temporarily mitigate the problem.Essential Tools for Your Zipper Repair Toolkit
The beauty of most zipper repairs is that they require only a few simple household tools. Before you throw out your tool bag or tent, try these tips for fixing a broken or stuck zipper. Here’s what you’ll likely need: * **Pliers:** Needle-nose pliers are ideal for delicate work, such as adjusting sliders, removing stoppers, and squeezing on new stops. Regular pliers can also work for some tasks. * **Graphite Pencil:** A standard pencil is an excellent lubricant for stuck zippers. * **Bar Soap or Wax:** Another effective lubricant, especially for tougher jams. * **Tweezers:** Useful for carefully pulling out snagged fabric or threads. * **Seam Ripper:** Essential if you need to remove and replace an entire zipper. * **Top Stops or Square Tabs (Zipper Bottom Stops):** These small metal or plastic pieces are crucial for securing the ends of the zipper chain. Square tabs are best for the bottom of a zipper because they will prevent the zipper from coming off and cover the gap in the zipper left by the missing teeth. * **Key Ring or Rubber Band:** For makeshift zipper pulls. With these items, you're well-equipped to tackle most common zipper issues.Step-by-Step Guide: How to Fix a Split Zipper
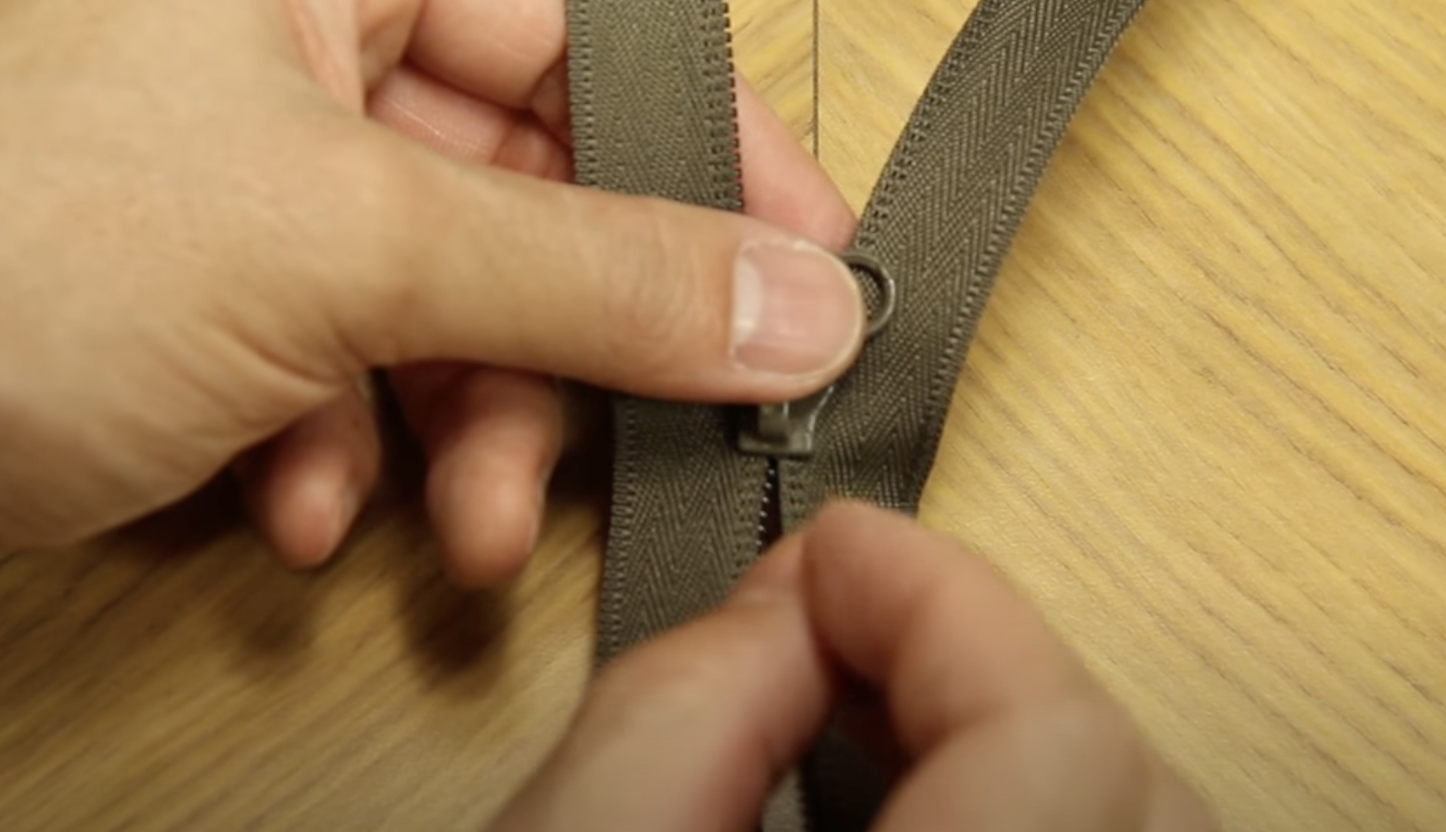
A split zipper is one of the most common and fixable problems. This method is really fast too, and it works when the zipper pull doesn't close the zipper together anymore. It’s an easy way to fix a zipper without replacing it. 1. **Pull the Slider Off of the Zipper:** First, you need to get the slider off the tracks. If there’s a metal or plastic stopper at the top or bottom of the zipper, you might need to gently remove it with your needle-nose pliers to allow the slider to come off. Zip the zipper all the way down to the bottom, then carefully work the slider off one side of the zipper teeth. 2. **Press the Teeth of the Zipper Together:** Once the slider is off, you’ll see the separated zipper teeth. Carefully press them together so they're alternating and popped into place. You might need to use your fingers to gently align them perfectly, ensuring they are interlocked as they should be when closed. 3. **Put the Slider Back on the Zipper:** This can be the trickiest part. Start by threading one side of the zipper into the slider, then carefully pull it towards the other end, aligning the other side of the zipper into the slider. It might take a few tries to get both sides to enter the slider smoothly and simultaneously. Ensure the zipper pull is facing the correct direction. 4. **Reattach the Stops (if removed):** If you removed any stops (either top or bottom), reattach them by squeezing them back into place with your pliers. If you don't have the original stops, you can purchase new top stops or square tabs and crimp them onto the end of the zipper using pliers. This prevents the slider from coming off again. This simple process can often fully restore a split zipper, allowing you to continue using your item.Unsticking a Stubborn Zipper: Simple Lubrication and Release Techniques
A stuck zipper can be incredibly frustrating. Whether it's caught on fabric or just stiff, these methods will help you unstick it. If your zipper is stuck or broken, follow these expert tips for applying a lubricant, adjusting the slider, and more. 1. **Free the Fabric:** One way to fix a stuck zipper is by pulling the fabric of the garment away from the zipper with your hands or a pair of tweezers. Carefully examine the area where the zipper is stuck to identify any snagged fabric or loose threads. Once most of the fabric is freed from the zipper, slide the zipper up and down in small, forceful movements to loosen the rest of the fabric. Be gentle but firm; don't yank too hard, or you risk damaging the zipper or the fabric. 2. **Apply Lubricant:** If the zipper is stiff or simply won't budge, lubrication is key. * **Graphite Pencil:** To fix a stuck zipper, start with a graphite pencil. Rub the tip of the pencil along the closed zipper teeth, trying to work the zipper down. The graphite acts as a dry lubricant, reducing friction. Do this on both sides of the zipper. * **Bar Soap or Wax:** For a more robust lubrication, use bar soap or wax (like a candle or beeswax). Rub the soap or wax along the zipper teeth, especially where it's stuck. The waxy residue will help the slider glide more smoothly. You can also use a small amount of petroleum jelly or lip balm in a pinch, but be mindful of potential staining on certain fabrics. 3. **Gentle Wiggling:** After applying lubricant, try to move the zipper pull gently. If it still resists, apply a little more lubricant and try wiggling the slider back and forth in tiny increments, rather than forcing it in one direction. Patience is crucial here.Rescuing a Broken or Detached Zipper Slider
If your zipper slider has completely separated from the rest of your zipper, or if the pull tab has broken off, don't despair. This is often a fixable problem. 1. **Reattaching a Detached Slider:** If the slider has come off completely, follow the steps outlined in "How to Fix a Split Zipper" to reattach it. You'll need to remove any existing top or bottom stops, re-thread the slider onto both sides of the zipper teeth, and then reattach or replace the stops to secure it. This process effectively helps you learn how to fix a zipper that has completely come apart. 2. **Fixing a Broken Pull Tab:** What you need to fix a zipper pull is often just a creative alternative. If the original pull tab has snapped off, you can easily create a new one. * **Key Ring Method:** Attach a key ring through the opening in the zipper tab. Zip up your zipper, and hook the key right around your pants button. Once you button your pants, the key ring is virtually invisible, providing a discreet and functional pull. * **Rubber Band Method:** Weave a rubber band through the opening in the zipper tab, then hook the two loops of the rubber band around your pants button. This is another simple and effective temporary solution. * **Paperclip or String:** For a quick fix, a paperclip or a piece of sturdy string can also serve as a temporary pull tab. * **Pliers (optional) how to fix a broken zip puller step 1:** If the small loop on the slider where the pull tab attaches is bent or closed, use needle-nose pliers to gently open it enough to attach your new pull.Addressing Missing Teeth and Preventing Zipper Sliders from Coming Off
Missing teeth can be a more challenging issue, but there are still ways to mitigate the problem or prevent further damage. 1. **Using Square Tabs for Missing Bottom Teeth:** If you have missing teeth at the very bottom of the zipper, square tabs (also known as zipper bottom stops) are best for the bottom of a zipper because they will prevent the zipper from coming off and cover the gap in the zipper left by the missing teeth. You simply position the square tab over the area where the teeth are missing and crimp it securely with pliers. This won't replace the missing teeth, but it will create a secure stop that prevents the slider from going past that point and coming off the tracks. 2. **Adding Top Stops to Prevent Slider Detachment:** If your slider frequently comes off the top of the zipper, it means the existing top stops are either missing or too weak. You can easily add new top stops. Get a pair of metal top stops (available at craft or sewing stores). Position one top stop onto the zipper, just above where the slider should stop, and squeeze it firmly with pliers. Repeat for the other side. This creates a robust barrier to keep the slider on track. 3. **Tightening a Loose Slider:** If the zipper teeth are separating behind the slider, it often indicates that the slider itself has become too loose or wide. The slider is designed to squeeze the zipper teeth together as it moves. Over time, the metal can loosen. To tighten it, take your pliers and gently squeeze the sides of the slider. Do this in very small increments, testing the zipper's function after each squeeze. Be careful not to squeeze too hard, as you could deform the slider and make it impossible to move, or even break it. The goal is to make the slider just tight enough to properly engage the teeth. This is a crucial step in learning how to fix a zipper that continuously splits.When All Else Fails: Replacing the Entire Zipper (and Alternatives)
Sometimes, despite your best efforts, a zipper is beyond repair. This is often the case with extensive damage, such as multiple missing teeth, a severely warped zipper chain, or a completely irreparable slider. In such scenarios, replacing the entire zipper is the most reliable solution. I don't really like to replace zippers, because they always come out a little bit wavy when I do it myself, but it's a viable option when necessary. 1. **Removing the Old Zipper:** * Turn the item inside out to reveal the back of the zipper and the stitching that's holding it in place. * Take a seam ripper and carefully remove the stitches until the zipper is completely separated from the fabric on both sides. Take your time to avoid damaging the garment's fabric. 2. **Sewing in a New Zipper:** This requires basic sewing skills. You'll need to purchase a new zipper of the correct length and type (e.g., separating, non-separating, coil, metal). Pin the new zipper in place, ensuring it's straight and properly aligned, then sew it in by hand or with a sewing machine. This can be a challenging task for beginners, as precise stitching is needed for a smooth, functional zipper. 3. **Considering Alternatives:** If replacing the zipper seems too daunting, or if the item's design allows, you might consider alternative closures: * **Buttons and Buttonholes:** For jackets or bags, buttons can be a stylish and functional replacement. * **Snaps or Poppers:** These offer a quick and easy closure, suitable for many types of garments or bags. * **Velcro:** While not as elegant, Velcro can be a practical and simple alternative, especially for utility items or children's clothing. * **Ties or Drawstrings:** For certain bags or pouches, a simple tie or drawstring can replace a zipper. This guide provides a comprehensive overview of how to fix common zipper issues such as zipper opening too soon, zipper teeth separating, zipper slider broken or stuck, and more. With these expert tips and a little practice, you will be able to fix your zippers quickly and prevent them from wearing out for a while.Conclusion
Dealing with a broken zipper can be a nuisance, but as we've explored, many common issues can be resolved with simple tools and a bit of patience. From understanding how to fix a split zipper by re-aligning teeth and reattaching the slider, to unsticking a stubborn pull with lubrication, and even rescuing a broken slider, you now have the knowledge to tackle these problems head-on. You've learned how to repair a splitting, broken or stuck zipper with simple tools and methods, empowering you to save your favorite garments and gear. Remember, a little maintenance, like occasional lubrication, can go a long way in extending the life of your zippers. Before you consider discarding an item, give these DIY fixes a try. You might be surprised at how easy it is to bring your beloved items back to life. Have you tried any of these zipper repair tips? Do you have a unique trick for fixing a zipper that you'd like to share? Leave a comment below and let us know your experiences! And if you found this guide helpful, don't forget to share it with friends and family who might be struggling with their own zipper woes. For more helpful DIY guides, be sure to explore other articles on our site!- Turkish Quandale Dingle
- Madelyn Cline Feet
- Acubi Dress To Impress
- Emiru No Makeup
- Imagenes De Buenos Dias
How to Fix a Zipper That Won't Close Within Seconds - Goody Feed

3 Ways to Fix a Jean Zipper - wikiHow

How to Fix a ZIPPER - Problems Solved | TREASURIE
